|
| Electric Vehicles | Overview | FAQ | Efficiency Analysis | Driver Resources |
Tom & Cathy's RAV4-EV
Window Stickers
Last Updated April 23, 2009
We wanted to provide information about the RAV4-EV and electric vehicles in general. We got this idea from Dan Davids, and originally used a method similar to his: 8 1/2 x 11 sheets of paper in the windows. This worked great (we saw footprints in snow from where people walked up to the windows!), but we decided that we wanted something that looked a little more integrated with the look of the vehicle.
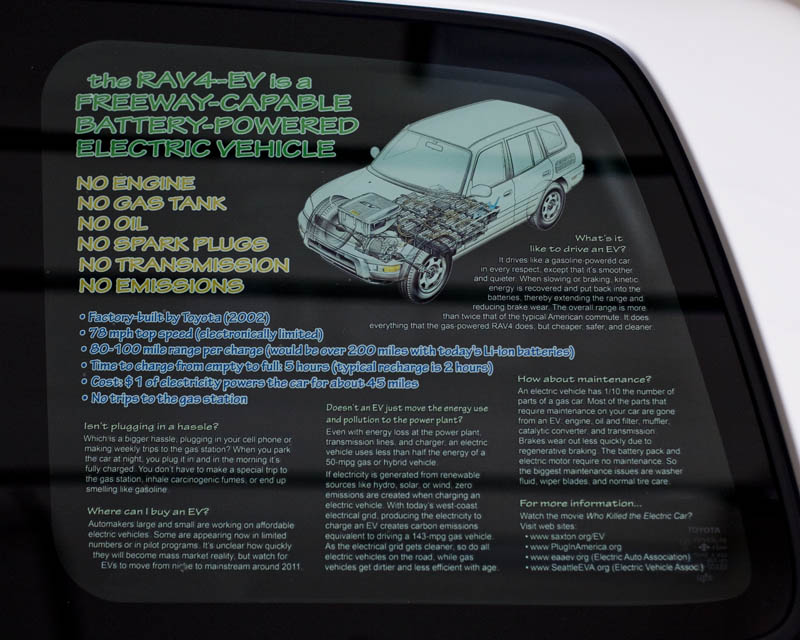
So, we designed a graphic using the entire area of the cargo-area side windows. We planned to have it printed on a transparent material to minimize the impact on visibility. We are very pleased with the results, but of course this is an incredibly difficult thing to photograph.
A photograph of the driver-side sticker is on the right; here's a link to a higher resolution photograph (JPG, 120k) of that sticker.
Sticker Application
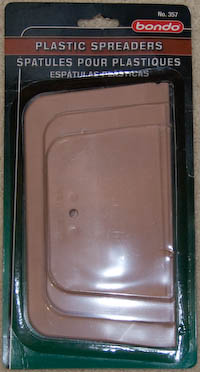
To apply the sticker, we used soapy water and flexible plastic scrapers that we got at Schuck's. They're pictured on the right. I've also seen suggestions to use kitchen spatulas (the rubber kind, not metal!). Basically, you want something that won't scratch the sticker, but has a straight edge and is firm enough to squeegee out water and air bubbles.
This task is easier with two people: one to do the application and the other on the outside of the vehicle providing feedback on the positioning.
Here are the steps we used:
- With the sticker still on its backing (and before spraying anything), hold the sticker up to the window to make sure it's trimmed appropriately and to get an idea of how it should be positioned.
- Clean the inside of the window thoroughly. Make sure to get all lint and dust particles off the window.
- Put water in a spray bottle and add a little liquid dish soap.
- Spray the inside of the window until it's dripping wet and making a soggy mess of your car.
- Peel the backing off the sticker, lay the sticker flat on a clean surface, then spray it thoroughly.
- Lift the sticker up to the window and position it. The soapy water will make it possible to slide the sticker around. But, since the surface is vertical, you're racing against gravity. I found it worked best to position the top (leaving the rest hanging and dripping), which I was able to slide around a bit. Once I got the whole sticker against the window, it wouldn't slide any more, although it would come off if I peeled it gently. I was able to reposition until I was satisfied with the result.
- Be sure you're happy with the positioning at this point. After the next step, you probably won't be able to remove the sticker without damaging it.
- Starting at the center of the sticker and working slowly and carefully, use the plastic scraper to squeegee the water and air bubbles toward the perimeter. I held a paper towel in my other hand to mop up as I went.
At this point, you're probably wondering why we didn't just use window clings. We originally planned to, but found out that they're not really intended for long-term use and would probably end up wearing out and peeling off before we were ready to replace them.
Resources
If you're interested in having stickers made for your RAV4-EV, you are welcome to use the following files with a few caveats: (1) No warranty from us - you are responsible for making sure that the files will give the results you want with the printer you choose; and (2) you may not sell or otherwise make a profit on these files (including after making your own modifications).
The yellow outline in the files in the 'cut line,' which results in the sticker being slightly larger than the clear area of the window. The edges of the sticker extend slightly onto the black area of the window, meaning no edges are visible from the outside.
Preview files
These files are raster images that show the content and layout for the stickers. These are useful for seeing what things will look like, but are not what you'll want to print.
- Driver Side preview (TIF, 1.3M)
- Passenger Side preview (TIF, 1.3M)
Original Artwork Files
These are Adobe Photoshop files with multiple layers and formatting. You can make modifications to them as you desire, but be aware that the text is manually wrapped to achieve the angled layout, so you'll need to make adjustments. These are the files you'll need to have printed.
- Driver Side original artwork (Zipped PSD, 13M)
- Passenger Side original artwork (Zipped PSD, 13M)
Printing
We had Stella Color print our stickers and are very pleased with the results. They can print and ship to you. A couple suggestions if you would like to have them print for you:
- To ensure that the final prints reflect the desired layout, include a preview file like the TIF files above. Use a raster format like TIF, JPG, or PDF.
- The quickest way to describe the product we got is "print flopped on Oracal 3620 clear adhesive vinyl with white ink behind to make 2nd surface window graphic." The translation of this is that we're printing a mirror image (flopped) because we're sticking it to the inside of the window, and that we want white behind everything to get the image to stand out better on the clear material.
- Approximate cost for printing and packaging two 18" x 15" clings would run $120. They expect freight to be in the $15 to $20 range for ground service to California, which would usually take 3 days. That pricing could change given the volatility of fossil fuel costs.
| Electric Vehicles | Overview | FAQ | Efficiency Analysis | Driver Resources |
|
©1996-2026 Tom and Cathy Saxton. You may not copy or reproduce any content from this site without our consent.